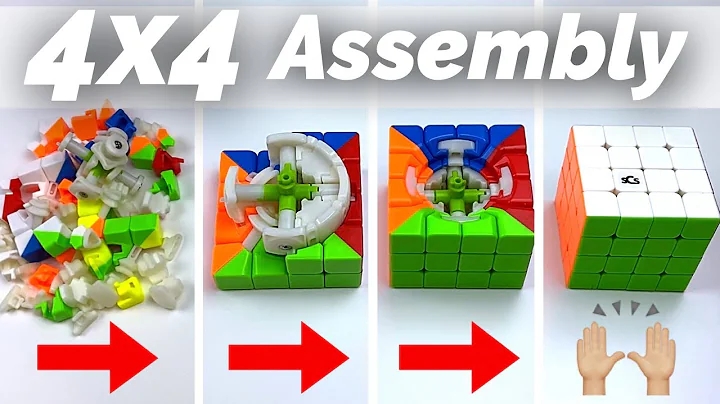
Assembling a 4×4 Rubik’s Cube involves a different process compared to solving it. Typically, you would assemble a 4×4 cube if you have disassembled it for maintenance or replacement of parts. Here’s a step-by-step tutorial on how to assemble a 4×4 Rubik’s Cube:
Materials Needed:
- Disassembled 4×4 Rubik’s Cube pieces
- Lubricant (optional, for smoother turning)
Step-by-Step Assembly Process:
- Gather Cube Pieces:
- Collect all the individual pieces of the 4×4 Rubik’s Cube: center pieces, edge pieces, corner pieces, and internal mechanism pieces (screws, springs).
- Prepare Core and Internal Mechanism:
- Begin by assembling the cube’s core and internal mechanism. This includes inserting the screws and springs into the core piece.
- Insert Edge and Corner Pieces:
- Start assembling the cube by inserting the edge pieces around the core. Each edge piece connects two centers.
- Place corner pieces at the corners of the cube, ensuring they align correctly with the adjacent edge pieces.
- Insert Center Pieces:
- Insert the center pieces into the core. These pieces determine the cube’s color scheme and remain fixed in place.
- Assemble Layers:
- Continue adding layers of edge and corner pieces, alternating between them to build the cube’s structure.
- Pay attention to the orientation and alignment of each piece to ensure they fit snugly together.
- Test and Adjust:
- Once all pieces are assembled, test the cube by turning each layer carefully.
- Check for any pieces that may not be fully inserted or are misaligned.
- Final Adjustments:
- Make any necessary adjustments to ensure all pieces are properly seated and the cube turns smoothly.
- Apply lubricant to the internal mechanism if desired, to improve the cube’s performance.
Tips:
- Handle with Care: Assemble the cube gently to avoid damaging the pieces.
- Refer to Guides: Use assembly guides or tutorials specific to your cube model if needed.
- Take Your Time: Assembly may require patience, especially aligning multiple layers of pieces.
Precautions:
- Avoid Over-tightening: Ensure screws are tightened securely but not overly tight to prevent damage.
- Keep Track of Pieces: Be mindful not to lose any pieces during assembly.
By following these steps and taking your time during assembly, you’ll successfully put together a 4×4 Rubik’s Cube. Enjoy the process and have fun solving the cube once it’s fully assembled! If you encounter any difficulties or have specific questions, feel free to ask for assistance. Happy cubing!
